
Death Must Die · Stun & Done
Kront Strike Build
Fill Kront's four Strike slots with wide-reaching triggers, make every one stun through Colossal Strike, and cash in the long control window with Ravage.
Updated for game data v0.8.8
- Gods
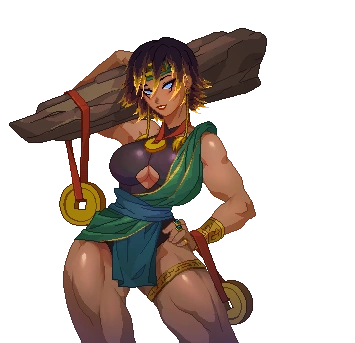 Ninh
Ninh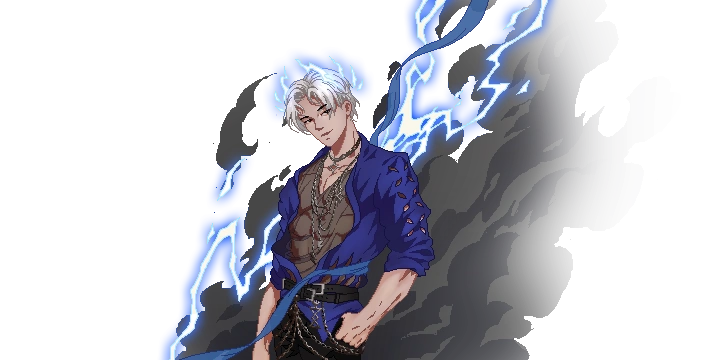 Leigong
 Winter
- Core
 Earth Spike
 Tornadoes
 Chain Lightning
 Ice Shards
 Chilling Attack
 Outreach
- Gear
- Strike Damage
- Strike Area
- Attack Speed
- Armor
Gods
Ninh
Strike Area + Stun
- Earth Spike
- Outreach
Earth Spike is a scaling Strike with its own Stun, while Outreach directly increases the Area of all four Strikes.
Leigong
Triggers + Strike Damage
- Tornadoes
- Chain Lightning
 Alacrity
 Thunderstruck
Tornadoes and Chain Lightning fill two Strike slots. Alacrity scales Strike Damage and Thunderstruck improves Attack chance triggers.
Winter
Freeze + Ravage
- Ice Shards
 Chill to the Bone
 Icebound
Ice Shards uses the fourth Strike slot to apply Chill. Freeze and Icebound add a second control payoff alongside Colossal Strike's Stun.
Blessing Priorities
Core
7 blessingsChilling Attack
Winter · Attack
Your Attacks become stronger and apply Chilled .
Build role: Uses the Attack blessing to apply Chill consistently and reach Freeze faster.
Earth Spike
Ninh · Strike
Every few Attack hits, create an earth spike that damages and stuns enemies.
Build role: A high-scaling Strike that already stuns and triggers every three attacks at higher levels.
Outreach
Ninh · Passive
Your Strikes have a larger area.
Build role: Its strike-area modifier stacks directly into the Colossal Strike plan.
Tornadoes
Leigong · Strike
Your Attack hits have a chance to create tornadoes that pull in and damage enemies.
Build role: Pulls enemies together while dealing persistent Strike Damage across the enlarged Stun area.
Chain Lightning
Leigong · Strike
Your Attack hits have a chance to cause a chain lightning.
Build role: Uses the third Strike slot for frequent multi-target damage and chained Stuns.
Alacrity
Leigong · Passive
For each enemy you hit with your Attack , your Strike damage is increased temporarily.
Build role: Directly modifies Strike Damage after Kront's wide melee Attacks hit enemies.
Ice Shards
Winter · Strike
Your Attack hits have a chance to throw ice shards that deal damage and apply Chilled .
Build role: Fills the fourth Strike slot, applies Chill, and benefits from Strike Damage and Area.
High Priority
4 blessingsThunderstruck
Leigong · Passive
After dashing, there is a chance you gain a status that gives you increased Attack chance triggers on your next Attack .
Build role: Its strike modifier increases Attack chance triggers after dashing.

Urgency
Leigong · Passive
Your cooldowns are reduced.
Build role: Its cooldown modifier helps Earth Spike and Tornadoes cycle more often.
Chill to the Bone
Winter · Passive
Legend
Reduces the Chilled stacks needed to freeze an enemy.
Build role: Reduces the Chill stacks needed to Freeze, improving Ravage uptime.
Icebound
Winter · Passive
Immobilized enemies take more damage.
Build role: Immobilized enemies take up to +60% Damage, rewarding the Ice Shards control package.
Situational
4 blessings
Hurricane
Leigong · Strike
Legend
Your Attack hits have a chance to create a hurricane that pulls in and damages enemies.
Build role: Replace Chain Lightning when a long-duration, large-area pull is more valuable than frequent chains.

Mountainous Might
Ninh · Passive
Your Attack Area is increased.
Build role: More Attack Area helps Kront hit more enemies and build Alacrity before the next Strike.

Shivers
Winter · Passive
Your Status effects last longer.
Build role: Extends Chill and Freeze, but Brute Force already handles the build's Stun duration.

Hoarfrost
Winter · Passive
Legend
Enemies take more damage for each status they have applied to them.
Build role: A strong late pickup when Stun and Chill are joined by additional statuses.
Gear Priorities
primary
Strike Damage
Scales all four selected Strike blessings.
Strike Area
Expands the damage and Stun coverage created by Colossal Strike.
secondary
Attack Speed
More Attack hits produce more opportunities to trigger the selected Strikes.
Armor
Supports the close-range Attack commitment needed to trigger the Strike package.
useful
Cooldown Reduction
Benefits cooldown-bearing Strikes such as Earth Spike and Tornadoes.
Practical build advice
Watch out for
Close-range commitment
The four-Strike package depends on repeated melee attacks, exposing Kront to boss and elite hits while triggers come online.
Control is not sustain
Stun and Freeze improve Ravage damage, but they do not replace healing or mitigation against bosses and enemies that keep acting.
What helps
Armor
Supports the melee uptime needed to trigger Strikes without treating control as complete protection.
Reliable healing
Add regeneration, healing-on-kill, or a defensive god swap before optional trigger scaling on harder runs.
The Freezer
Adds another Frozen source and extends the control window that enables Ravage, while remaining an enhancement rather than required sustain.
Unique Boosts

Enhancer · Great if you have it
The Ravager
Mythic · Tier 3 · Barbarian
This Barbarian axe adds major Strike Damage and Strike Area, and its fixed effect rewards Attack Damage. Its -70% Luck is a real tradeoff for chance-based Strike triggers.

Enhancer · Great if you have it
The Freezer
Epic · Tier 3 · Unrestricted
Its attacks can apply Frozen and its Permafrost effect increases Frozen Status Duration, strengthening the Winter and Ravage control loop.
Talents

Colossal Strike
Rank 1/1Your Strikes have a larger area and stun enemies.
Build impact: Gives every Strike +200% Area and makes every Strike stun.

Core Strength
Rank 4/5Your Strike damage is increased, but you have less Luck.
Build impact: Adds +80% Strike Damage; stopping at rank four leaves one point for Brute Force.

Brute Force
Rank 1/3Stun statuses you apply last longer.
Build impact: Extends the Stun applied by Colossal Strike by +600%.

Ravage
Rank 3/3Stunned, frozen, immobilized, and afraid enemies take more damage.
Build impact: Controlled enemies take +99% Damage, converting the build's Stuns and Freezes into damage.

Ram
Rank 3/3Your strikes deal more damage.
Build impact: Adds +12% Strike Damage before the late-tree multipliers come online.

Wild Swing
Rank 3/3Your attacks and strikes have a larger area.
Build impact: Adds +15% Area to Attacks and Strikes.

Recklessness
Rank 5/5All damage you deal and take is increased.
Build impact: Adds +20% Damage at the cost of +12% Damage Taken.
Talent Tree
Tenacity
Rank 0 / 5You have more life.
- Life: +3%
Pummel
Rank 4 / 4You deal more damage to enemies without barriers.
- Damage vs Barriers: +12%
Ram
Rank 3 / 3Your strikes deal more damage.
- Strike Damage: +12%
Experienced Prescience
Rank 2 / 2You gain more control over your God offers.
- Alterations: +4
Beast Power
Rank 0 / 5Your attack hits have a chance to knock back enemies.
- Beast Power: Chance: +5%
- Beast Power: Range: +300
Crush the Weak
Rank 0 / 1Your attacks apply Stun to enemies without barriers.
Forge Path
Rank 1 / 2You gain more control over your God offers.
- Banishes: +2
Intimidating Warp
Rank 0 / 3Your experience pull area is increased.
- Pull Area: +20%
Enrage
Rank 0 / 3When an enemy hits you, become enraged. While enraged, your Strike, Cast, and Power damage bonuses convert to Attack damage instead.
- Enrage: Skill Percentage: +140%
- Enrage: Duration: +4s
- Enrage: Cooldown: +16s
Pulverize
Rank 2 / 5You deal more damage to enemy barriers and bosses.
- Damage vs Barriers: +6%
- Damage vs Bosses: +6%
Wild Swing
Rank 3 / 3Your attacks and strikes have a larger area.
- Area: +15%
Iron Will
Rank 0 / 5Your armor is increased.
- Armor: +3%
Trample
Rank 0 / 3While enraged, your Dash recharge speed is increased.
- Dash Recharge Speed: +8%
Recklessness
Rank 5 / 5All damage you deal and take is increased.
- Damage: +20%
- Damage Taken: +12%
Barbarian’s Wisdom
Rank 0 / 2You have more Power slots.
- Power Slots: +1
Unmovable
Rank 0 / 1You can't be stunned or frozen.
Ravage
Rank 3 / 3Stunned, frozen, immobilized, and afraid enemies take more damage.
- Damage vs Control-Impaired Enemies: +99%
Cleave
Rank 0 / 4You gain additional Attack Area bonuses from items.
- Attack Area from Items: +6%
Renowned Master
Rank 2 / 2Your chance for Master offers is increased.
- Master Offers: +4%
Behemoth Heart
Rank 3 / 3You gain Life Regeneration equal to a percentage of your Max Life.
- Life Regeneration from Max Life: +0.15%
Overwhelming Momentum
Rank 0 / 4Gain Attack Damage and Attack Area every second until your next attack.
- Attack Damage per Second: +20%
- Attack Area per Second: +20%
- Max Attack Damage: +60%
- Max Attack Area: +60%
A Living Legend
Rank 2 / 3Your chance for Legend offers is increased.
- Legend Offers: +6%
Overpower
Rank 0 / 3Your Attack and Power damage are increased for every Life point you have.
- Attack Damage per Life Point: +0.04%
- Power Damage per Life Point: +0.04%
Berserk
Rank 0 / 2While enraged, you have increased Attack Speed.
- Attack Speed while Enraged: +11%
Brute Force
Rank 1 / 3Stun statuses you apply last longer.
- Stun Duration: +600%
Core Strength
Rank 4 / 5Your Strike damage is increased, but you have less Luck.
- Luck: -24%
- Strike Damage: +80%
Aftershock
Rank 0 / 3Damage dealt by Powers has a chance to stun enemies.
- Aftershock: Chance: +5%
Warchief
Rank 0 / 1Whenever you Dash, stomp the ground around you, knocking back enemies and dealing a percentage of your Attack damage.
- Warchief: Attack Damage: +90%
- Warchief: Area: +2000
- Warchief: Knock Back: +100
- Warchief: Cooldown: +1s
Devastate
Rank 0 / 3Your attacks have a chance to stun enemies.
- Devastate: Chance: +10%
Rampage
Rank 0 / 1While enraged, you have increased Attack Damage and Attack Area.
Colossal Strike
Rank 1 / 1Your Strikes have a larger area and stun enemies.
- Strike Area: +200%
Ancestral Knowledge
Rank 0 / 1Whenever a Power triggers, there is a chance it triggers an additional time.
- Ancestral Knowledge: Chance: +50%
Alternatives
No Winter?
Take Krom for Chains of War and Shurikens, then support Rupture with Bloodlust or Hemorrhage. This trades Freeze and Icebound for a more aggressive damage package.
No Leigong?
Time offers Energy Missiles plus Deadlock for longer Strike effects. Aegir is another option when Tidal Wave and Whirlpool grouping are preferable.
Attack Blessing
Chilling Attack is the default. Split-second Attack favors more Attack triggers; Crushing Attack supplies early Stun before Colossal Strike is unlocked.
Fourth Strike
Use Hurricane instead of Chain Lightning for a slower persistent pull. Moirai infusions cost a Strike slot, so only take one when its upgrade outweighs losing the fourth Strike.
High-Darkness floor
Prioritize Armor and a healing source before adding more trigger stats. This version must keep attacking at close range and cannot rely on control alone against bosses.
Warchief alternative
Warchief with Enrage, Trample, and Rampage is the distinct Dash route. It scales Attack Damage and Area without needing the four-Strike control package.